Payment Flow Explanation:

Click on Add payment
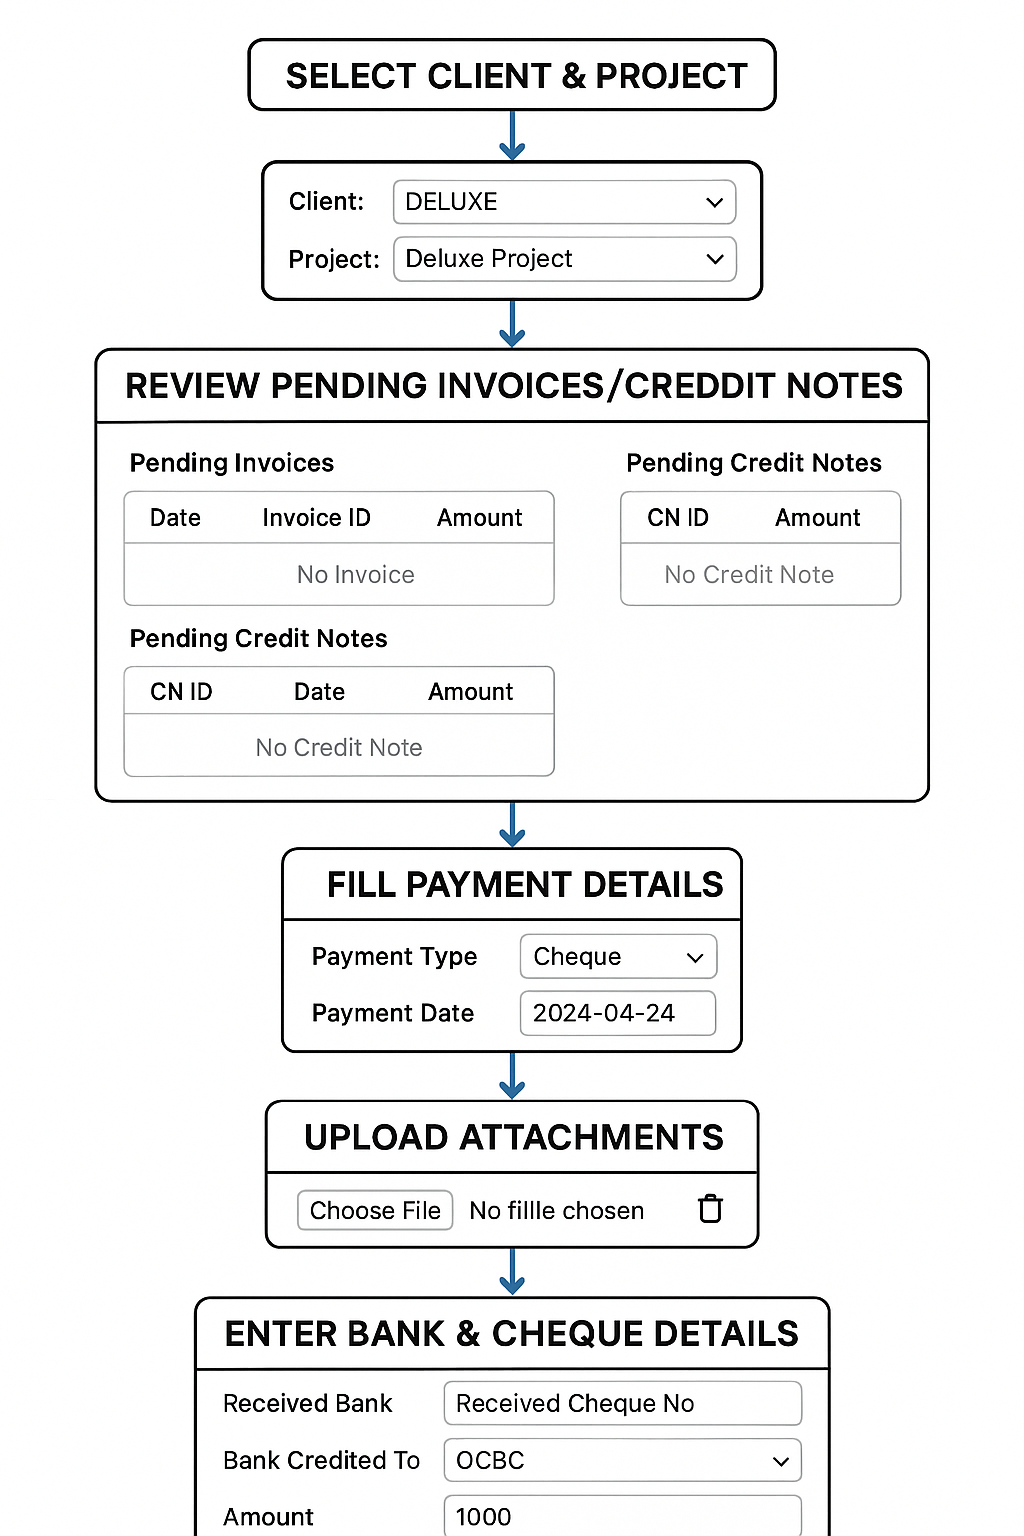
Client and Project Selection
- At the top, you first select the Client Name from the dropdown list (example shown: DELUXE).
- Then, select the associated Project Name (example shown: Deluxe Project).
- There is an option to create a new project if needed by clicking the + New button.

- Pending Invoices and Credit Notes
- Pending Invoice Section: Displays any invoices that are unpaid for the selected client and project.
- Columns include Date, Invoice ID, Amount, and Paid Status.
- In the image, it shows “No Invoice,” meaning no pending invoices exist.
- Pending Credit Note Section: Lists any pending credit notes for the client.
- Columns include CN ID (Credit Note ID), Date, and Amount.
- In this case, it shows “No Credit Note.”
- Pending Invoice Section: Displays any invoices that are unpaid for the selected client and project.

- Payment Details
- Payment Type: Choose how the payment is made (e.g., Cheque, Cash, Bank Transfer).
- Payment Date: Select the date the payment is received.
- Attachments
- There is an option to Add Attachments like scanned cheques, bank slips, or payment proofs.
- Files can be uploaded through the “Choose File” button.
- A delete (trash bin) icon allows removal of attachments if needed.

- Bank and Cheque Information
- Received Bank: Select the bank into which the payment was received.
- Received Cheque No: Enter the cheque number (if payment is by cheque).
- Bank Credited To: Choose the bank account where the payment is credited (e.g., OCBC).
- Amount: Enter the payment amount received.

- Final Actions
- After filling in all details, you have two options:
- Submit the payment to finalize and record it.
- Cancel if you wish to discard or reset the information entered.
- After filling in all details, you have two options:
Summary of Flow:
Select Client & Project → Review Pending Invoices/Credit Notes → Fill Payment Details → Upload Attachments → Enter Bank & Cheque Details → Submit
Notes:
- The system helps you track outstanding invoices and credit notes linked to each client/project.
- It ensures that received payments are properly documented against the correct bank accounts.
- Allows smooth handling of cheque payments with attachment upload for proof.
- Keeps a clean audit trail with all recorded payments.