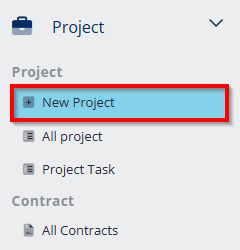
- Go to Project module, click New project.
New project creation
Step 1: Basic Information
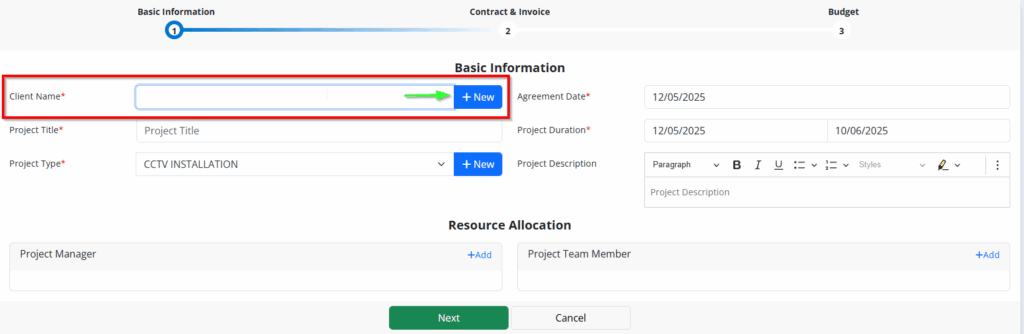
- Select an existing client name or click New to create a new project name.
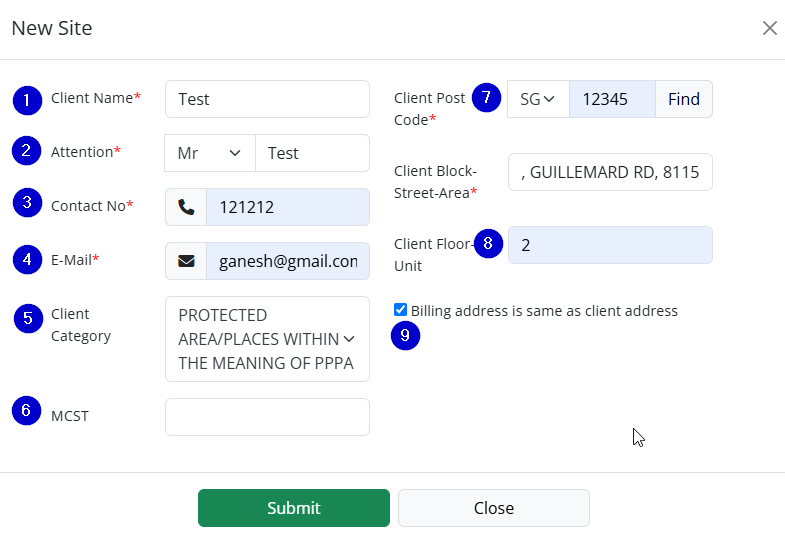
- Enter the client’s name.
- Enter the attention/contact person’s name.
- Enter the contact number.
- Enter the email ID.
- Select the client category.
- Enter the MCST number (if applicable).
- Enter the client’s postal code.
- Enter the client’s block, street, and area details.
- Tick the checkbox if the billing address is the same as the client address.
Click Submit — the new client name will be added to the dropdown list.
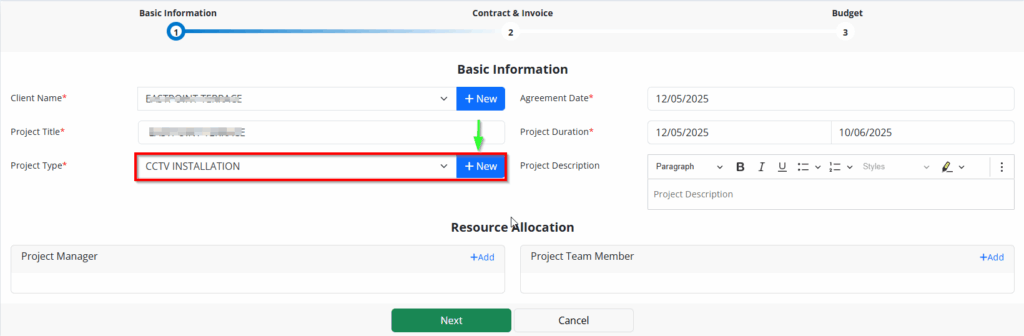
- Select the Project type and if not available click New.
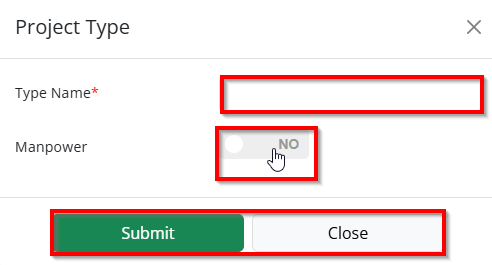
- Enter the Type name
- Enable Manpower if the project require.
- Click Submit and the project type will be added to the dropdown list.
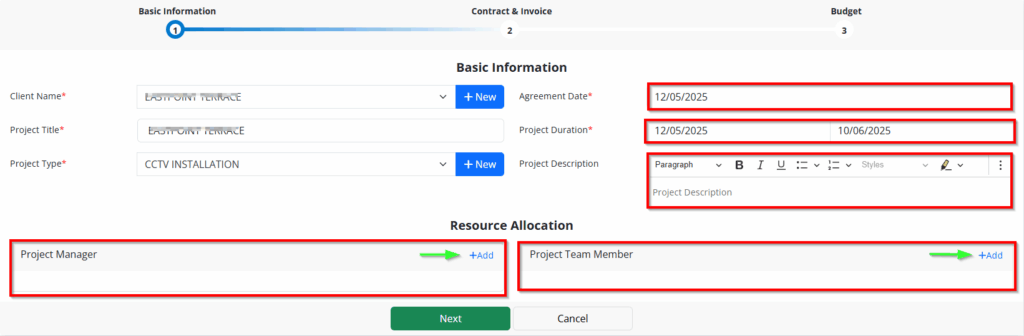
- Select the agreement date.
- Select the project duration period.
- Enter the project description.
- In the Project Manager section, click Add to include the staff member.
- In the Project Team Member section, click Add to include team members.
Once updated required basic information, click Next and move to Contract & Invoice.
Step 2: Contract & Invoice
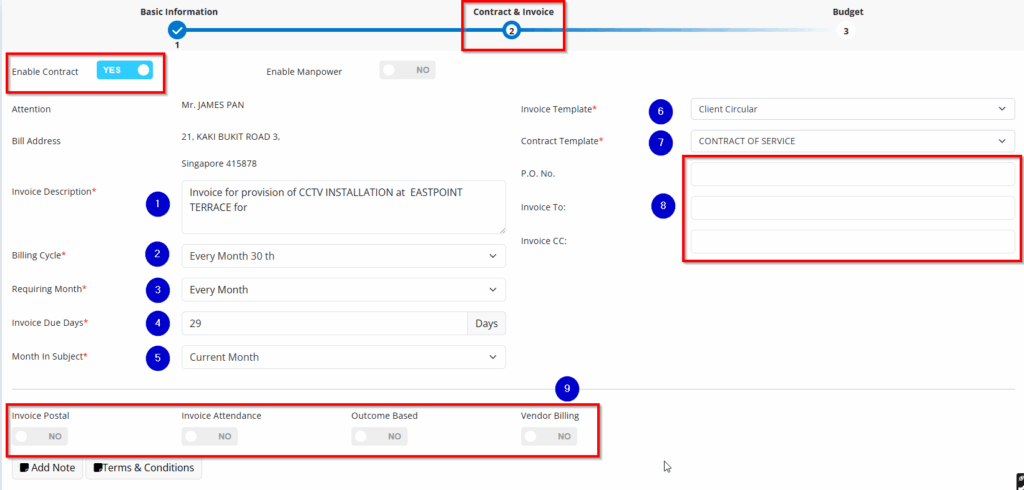
Enable contract (if applicable)
- Update the invoice description as needed.
- Select the appropriate billing cycle.
- Choose the applicable month for billing.
- Enter the number of days for the invoice due date.
- Select the month to appear in the invoice subject.
- Choose the invoice template.
- Choose the contract template.
- If applicable, enter the PO number, “Invoice To,” and “Invoice CC” details.
- Set Yes or No for the following options: Invoice Portal, Invoice Attendance, Outcome-Based Billing, and Vendor Billing.
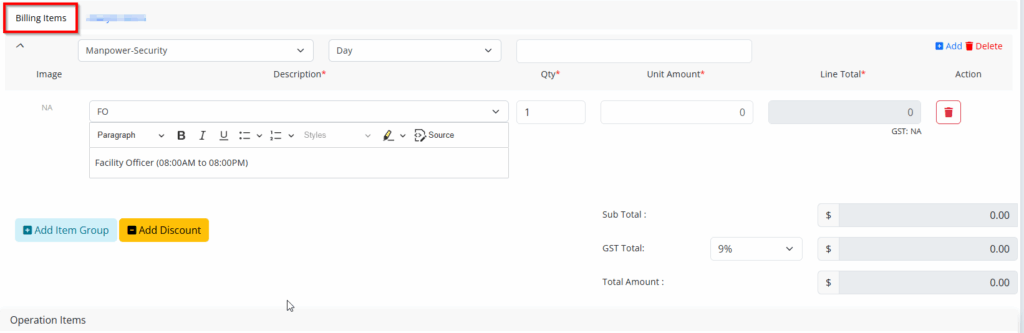
- Billing Items Entry
- Add all service and product items under their correct categories:
- Manpower Security
- Ad-hoc Security
- Technology Services
- Security Products
- Non-Security Products
- Products (general)
- FOC (Free of Charge items)
- Installation & Maintenance Services
- Make sure to add the appropriate maintenance group under Installation & Maintenance when needed.
- Add all service and product items under their correct categories:
- Discount Application
- If there are any discounts applicable, add them clearly at the appropriate section.
- Subtotal and Tax Calculation
- Enter the subtotal amount — the total before any taxes are added.
- Input the GST (Goods and Services Tax) percentage.
- The system should automatically calculate the GST total based on the subtotal.
- Total Invoice Amount
- The system will automatically calculate the final total amount (Subtotal + GST – Discounts).
Analytic items
Adding an analytic item allows you to generate detailed project reports, such as profit and loss analysis.

- Click Add Analytic Item to include a new entry.
- Select the Shift, Designation, enter the Count, and specify the Amount.
Enable manpower (if applicable)

Add operations item
- Click Add operations item and select the shift, hours from and to, guard, and quantity as per the requirement.
Add Ramp up

- Click Add Ramp Up and then Add Ramp Up Item to specify the days on which ramp-up is required.
- Select the shift, start and end hours, guard, and quantity as per the requirement.
Add Ramp down

- Click Add Ramp Down and then Add Ramp Down Item to specify the days on which ramp-down is needed.
- Select the shift, start and end hours, guard, and quantity as per the requirement.
Once updated required contract & invoice, click Next and move to budget.
Step 3: Budget
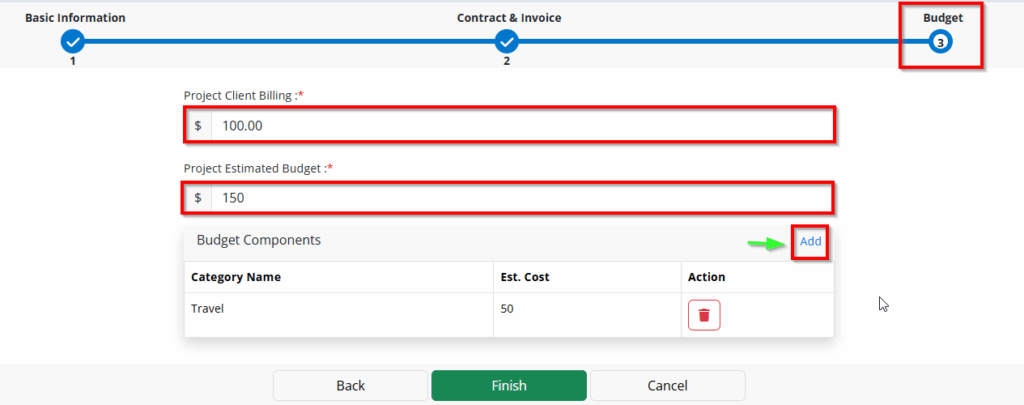
- Enter the client billing amount for the project.
- Enter the estimated budget amount for the project.
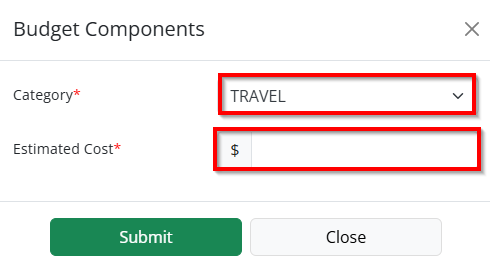
- Under Budget Components, click Add, select the category and enter the estimated cost, then click Submit.
Once the required budget details are updated, click Finish. The project will be created successfully and displayed under All Projects.