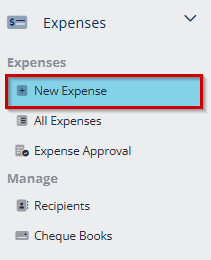
- Go to Expenses module, click New expense.
Creation of expense
Step 1:
Project based expense:
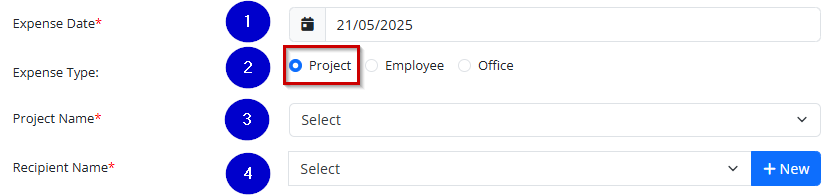
- Enter the expense date.
- Select the Project expense type.
- Choose the project name.
- Select the recipient name. If the name is not listed, click “New” to add a new recipient.
Employee based expense

- Select the Employee expense type.
- Select the employee name.
Office based expense

- Select the office expense type.
- Select the recipient name. If the name is not listed, click “New” to add a new recipient.
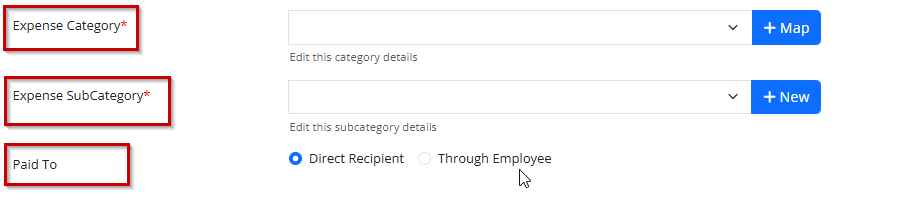
- Once the recipient name is selected, the associated expense category will be mapped automatically. If it doesn’t match, click Map and select the appropriate category.
- Select the sub-category. If it’s not available, click New to add the desired sub-category name.
- Choose the payment method—either paid directly to the recipient or through an employee.
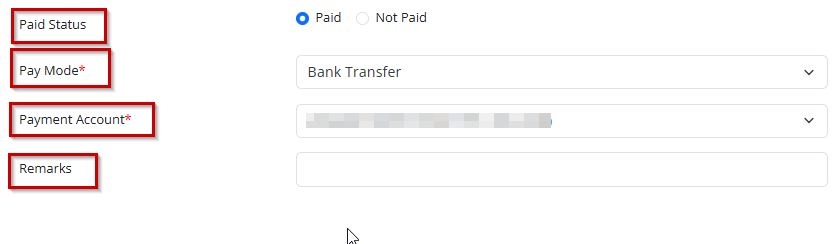
- Select the payment status – either Paid or Not Paid.
- Choose the payment mode (Bank Transfer, Cheque, Cash, or GIRO).
- Select the appropriate payment account.
- Enter any remarks for future reference.
Step 2:

If the expense receipt is available, attach it by clicking Add Attachment.
Step 3:
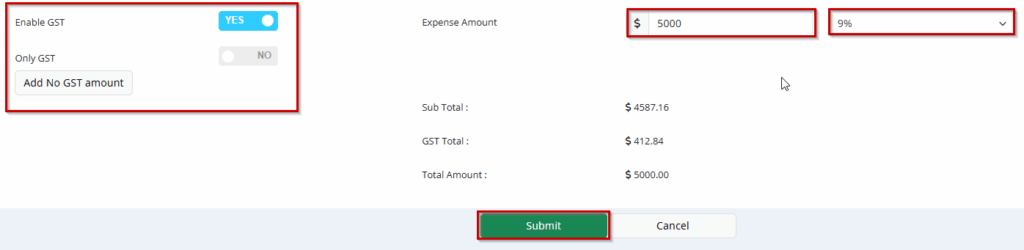
- Enable GST if required.
- Enable Only GST, if required.
- Add No GST amount, if required.
- Enter the amount and give submit.
The expense has been created successfully and is now visible under All Expenses.