1. Overview
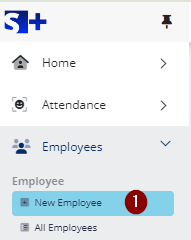
Step 1 : Click New Employee menu under “Employees Module”.

Creating an employee have five section , such as Personal Details, Official & Salary Details, Experience, Disclosure and Review.

- Click Save button to save as a draft employee.
- Click Next button move on to next section.
- Click Previous button move on to previous section.
Note : The fields having * marks indicates mandatory fields.
2. Personal Details
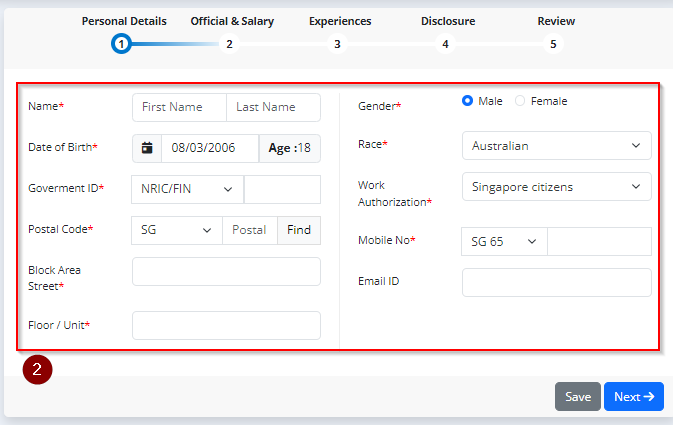
Step 2 : Enter personal details.
- Name : Enter first and last Name.
- Date of Birth : Select date of birth. Age should be 18 or 18 above.
- Government ID : Select government ID type and enter ID based on government ID type.
- Postal Code : Select country code and enter postal code.
- Block Area Street : Enter your address.
- Floor / Unit : Enter floor or unit.
- Gender : Select gender.
- Race : Select race.
- Work Authorization : Select work authorization.
- Mobile No : Select country code and enter mobile number.
- Email ID : Enter email id.
- Click Next – When click next the employee personal detail has been saved.
3. Official Salary Details
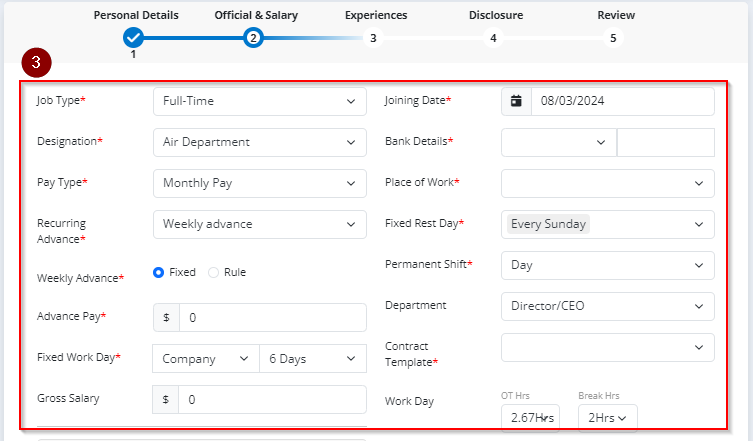
Step 3 : Enter official details.
- Job Type : Select job type. If you select job type Full Time enter base salary and if you have Allowance/Deduction to enter the amount
- Designation : Select designation.
- Pay Type : Select pay type. If you select Daily Pay/Weekly Pay enter salary per day.
- No of Work Days : Select no of work days.
- Gross Salary : Enter gross salary.
- Joining Date : Select joining date.
- Bank Details : Select bank name and enter account number.
- Place of Work : Select place of work.
- Fixed Rest Day : Select fixed rest day.
- Permanent Shift : Select permanent shift.
- Department : Select department.
- Work Day Week : Select work day week
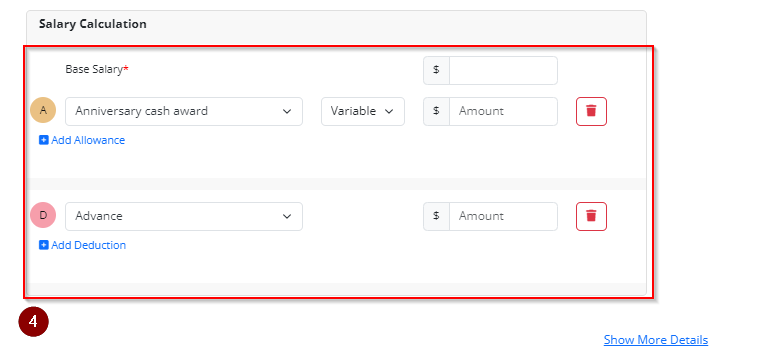
Step 4 : Enter salary calculation details.
- Base Salary : Enter base salary
- Click add allowance
- Allowance Name : Select allowance name
- Allowance Type : Select allowance type
- Allowance Amount : Enter allowance amount
- Click add allowance
- Deduction : Select deduction
- Deduction Amount : Enter deduction amount
- Click show more details.
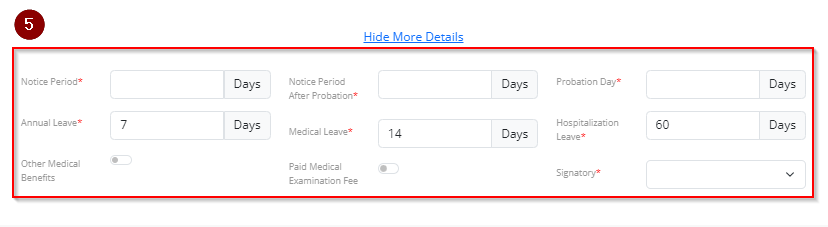
Step 5 : Enter leave details.
- Notice Period : Enter notice period
- Notice Period After Probation : Enter notice period after probation
- Probation Day : Enter probation day
- Annual Leave : Enter annual leave
- Medical Leave : Enter medical leave
- Hospitalization Leave : Enter hospitalization leave
- Signatory : Select signatory
- Click Next – When click next the employee Official & Salary detail has been saved
4. Experience

Experience have six section, such as Work Experience, Education, Skill, Certification, Language and Attachment.
4.1. Work Experience
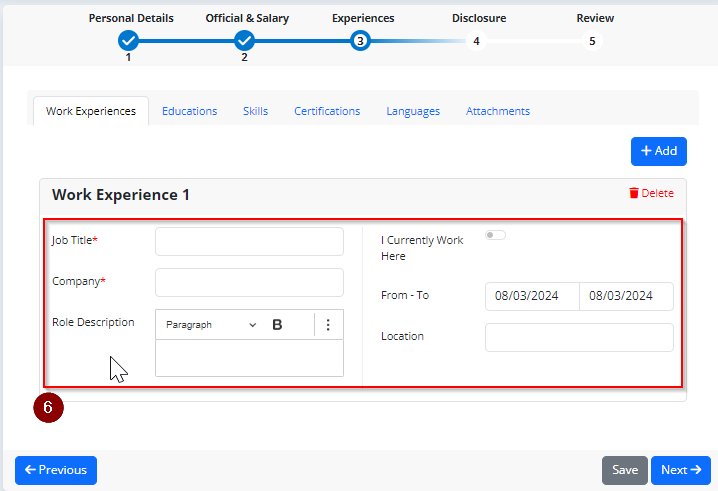
Step 6 : Enter work experience details.
- Click add
- Job Title : Enter job title.
- Company : Enter company name.
- Role Description : Enter your job role details.
- From – To Date : I currently work here (If i currently work here is selected YES, then select from date only ,If i currently work here is selected No, then select from and to date).
- Location : Enter company location.
4.2 Education
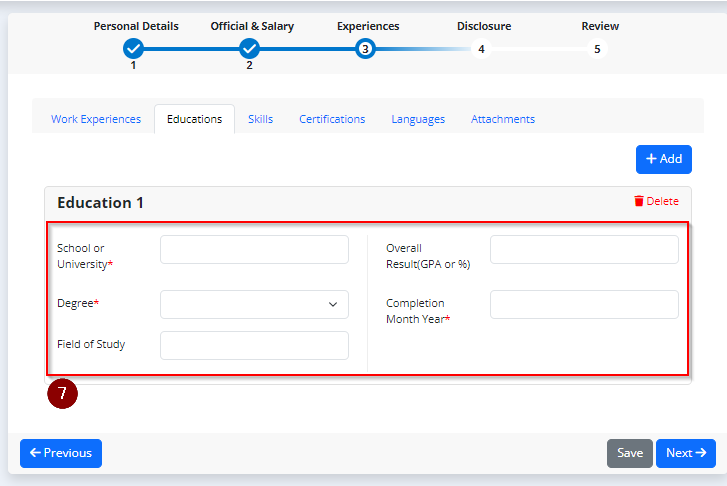
Step 7 : Enter education details.
- Click add
- School or University : Enter school or university.
- Degree: Select your degree level .
- Field of Study : Enter your field of study.
- Overall Result : Enter your GPA.
- Completion Month Year : Choose the month and year that you completed your studies.
4.3 Skill
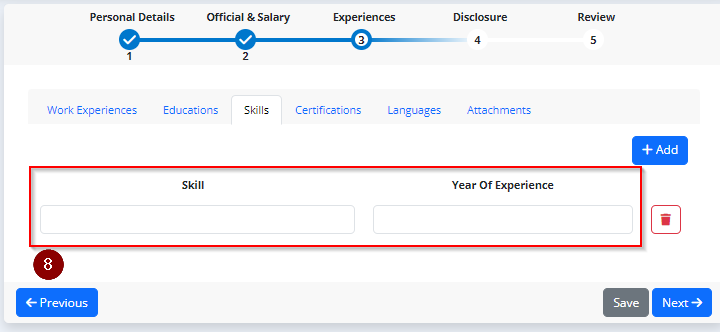
Step 8 : Enter skill details.
- Click add
- Skill : Enter your well known skill.
- Year Of Experience : Indicate the number of years you have worked in the relevant skill.
4.4 Certification
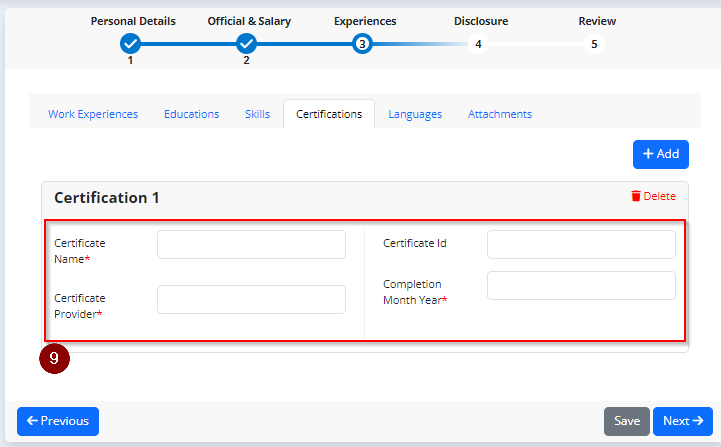
Step 9 : Enter certification details.
- Click add
- Certificate Name : if you have any certifications of skill completion. Put that name here.
- Certificate Id : Enter certificate id
- Certificate Provider : Mention certificate provider name.
- Completion Month Year : Choose the month and year that you completed your skill.
4.5 Language
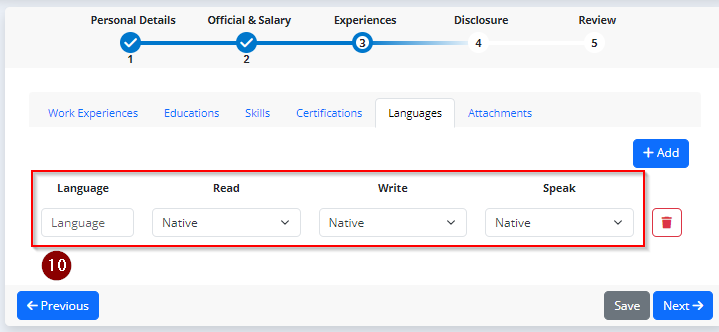
Step 10 : Enter language details.
- Click add.
- Language : Enter known language.
- Read : Select language reading level.
- Write : Select language writing level.
- Speak : Select language speaking level.
4.6 Attachment
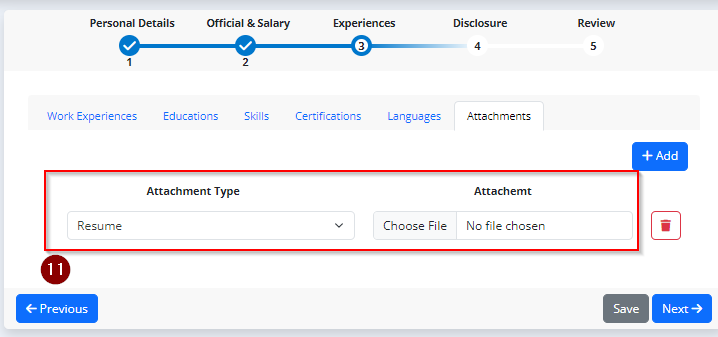
Step 11 : Add attachment .
- Click add
- Attachment Type : Select attachment type.
- Attachment : Upload file based on attachment type.
- Click Next – When click next the employee Experience data has been saved
5. Disclosure

Disclosure have two section, such as Disclosure and Term.
5.1. Disclosure
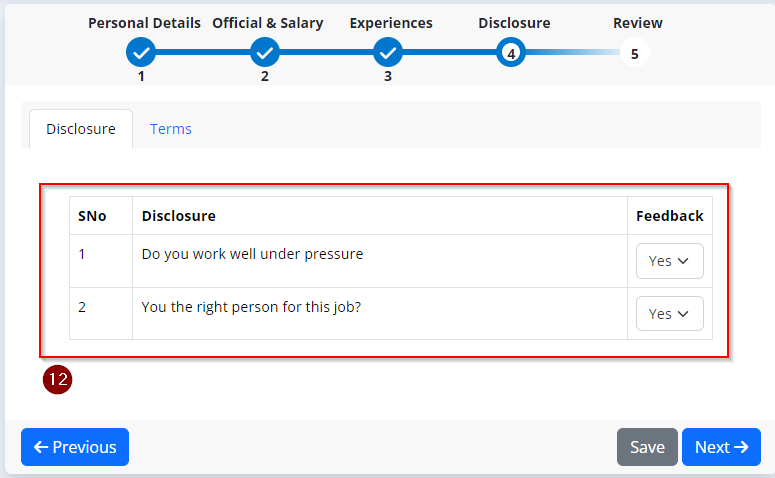
Step 12 : Answer disclosure feedback.
- Disclosure : Answer the disclosure feedback question.
5.2. Terms
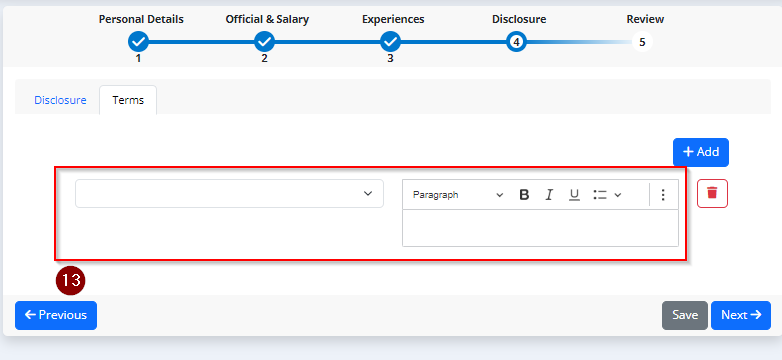
Step 13 : Enter terms.
- Terms Type : Select terms type.
- Description: Enter description.
- Click Next – When click next the employee disclosure data has been saved
6. Review

- Click Submit employee has been created.

Finally you are able to examine previously provided employee information and click save button the employee has been created successfully.